Revolutionize Your Kitchen with Homemade 2-Ingredient Coconut Yogurt: Thick & Dairy-Free Bliss
Imagine a spoonful of luxuriously thick, tangy yogurt, rich with the tropical essence of coconut, yet completely free from dairy, questionable additives, and excessive sugar. Sounds like a dream, right? For many, the quest for a genuinely healthy and delicious dairy-free yogurt has been a frustrating journey through supermarket aisles, only to find labels laden with ingredients we'd rather avoid. But what if we told you that the secret to perfect, creamy coconut yogurt lies in just two simple ingredients and a little patience? You can achieve that thick, Greek-style consistency right in your own kitchen, sidestepping all the common pitfalls and artificial thickeners.
We've delved deep into the world of homemade dairy-free alternatives, experimenting with countless methods to crack the code for truly exceptional coconut yogurt. After a journey filled with trial and error, we’ve finally perfected a method that’s so straightforward, you’ll wonder why you ever bought store-bought. Prepare to say goodbye to mystery ingredients and hello to pure, wholesome goodness with our easy 2-ingredient recipe for homemade dairy-free coconut yogurt.
The Problem with Store-Bought Coconut Yogurts: A Deep Dive into Additives
While the convenience of store-bought coconut yogurt is tempting, a closer look at the ingredient list often reveals a less-than-desirable truth. Most commercial brands, even those marketed as "healthy," rely heavily on an array of thickeners, stabilizers, and flavor enhancers that can be detrimental to your digestive health and overall well-being. This is precisely why embarking on your own homemade journey is so empowering.
Avoid Additives: Make Your Own Healthy Dairy-Free Coconut Yogurt and reclaim control over what goes into your body.
One of the most notorious culprits is **Carrageenan**. Derived from red seaweed, carrageenan is a common food additive used for its gelling, thickening, and stabilizing properties. While it's natural in origin, numerous studies suggest that degraded carrageenan, and even food-grade carrageenan, can cause significant inflammation in the digestive system. For anyone with a sensitive gut, or even those looking to maintain optimal digestive health, avoiding carrageenan is a wise choice.
Then there are various **gums**, such as locust bean gum and guar gum. These are also used to stabilize, emulsify, and thicken foods. While they don't carry the same inflammatory risks as carrageenan, they can still be problematic for individuals with highly sensitive digestive systems, particularly those managing conditions like Irritable Bowel Syndrome (IBS) or Small Intestinal Bacterial Overgrowth (SIBO). These gums are fermentable fibers, and for some, their consumption can lead to uncomfortable bloating, gas, and digestive upset. Regular consumption of products containing them might inadvertently contribute to ongoing digestive issues.
And let's not forget **"natural" flavors**. The term "natural" can be incredibly misleading in the food industry. These flavors often undergo extensive processing and can contain proprietary blends of chemicals, preservatives, and solvents that don't need to be disclosed on the label. Without knowing the source or extraction methods, trusting these ingredients becomes a leap of faith that many health-conscious consumers are unwilling to take. It's always best to consume foods where you recognize and understand every single ingredient.
Given the scarcity of genuinely clean-ingredient coconut yogurts at a reasonable price, especially in markets like the US, the decision to make our own was not just a preference, but a necessity for truly wholesome eating.
Why Homemade Trumps Store-Bought: Unveiling the Two-Ingredient Secret
The beauty of homemade dairy-free coconut yogurt lies in its simplicity and purity. Our revolutionary method cuts through the noise, proving that you don't need a pantry full of specialized ingredients or complex steps to create a superior product. This isn't just about saving money; it's about making a conscious choice for your health and taking pride in understanding exactly what nourishes your body.
The secret to our thick and creamy homemade dairy-free coconut yogurt involves just two core components:
- High-Quality Coconut Cream: This is the foundation, providing the rich fat content essential for a Greek-style texture.
- Potent Probiotic Cultures: These beneficial bacteria are the alchemists, transforming the coconut cream into tangy, gut-loving yogurt.
That's it! No gelatin for jiggle, no added sugars to kickstart fermentation (the probiotics don't need it if they're high quality), and certainly no artificial thickeners or natural flavors. This minimalist approach not only guarantees a cleaner product but also allows the pure, natural flavor of coconut to shine through.
Mastering the Thickness: The Cream vs. Milk Revelation
One of the biggest hurdles in our early attempts at homemade dairy-free coconut yogurt was achieving that coveted thick, spoonable texture. Our initial experiments, much like many others who venture into DIY yogurt, involved using coconut milk. We mistakenly assumed that, just like traditional dairy yogurt, fermentation alone would magically thicken it. The result? A dishearteningly runny, liquid consistency that was more akin to thin milk than yogurt – definitely not what we were aiming for.
This common pitfall highlights a crucial difference: coconut milk, especially the 'beverage' variety or even full-fat canned milk without separation, simply doesn't have enough fat content to naturally firm up during fermentation. It's too watery, and the delicate process of bacterial fermentation won't change that fundamental composition.
Our "aha!" moment came with the switch to
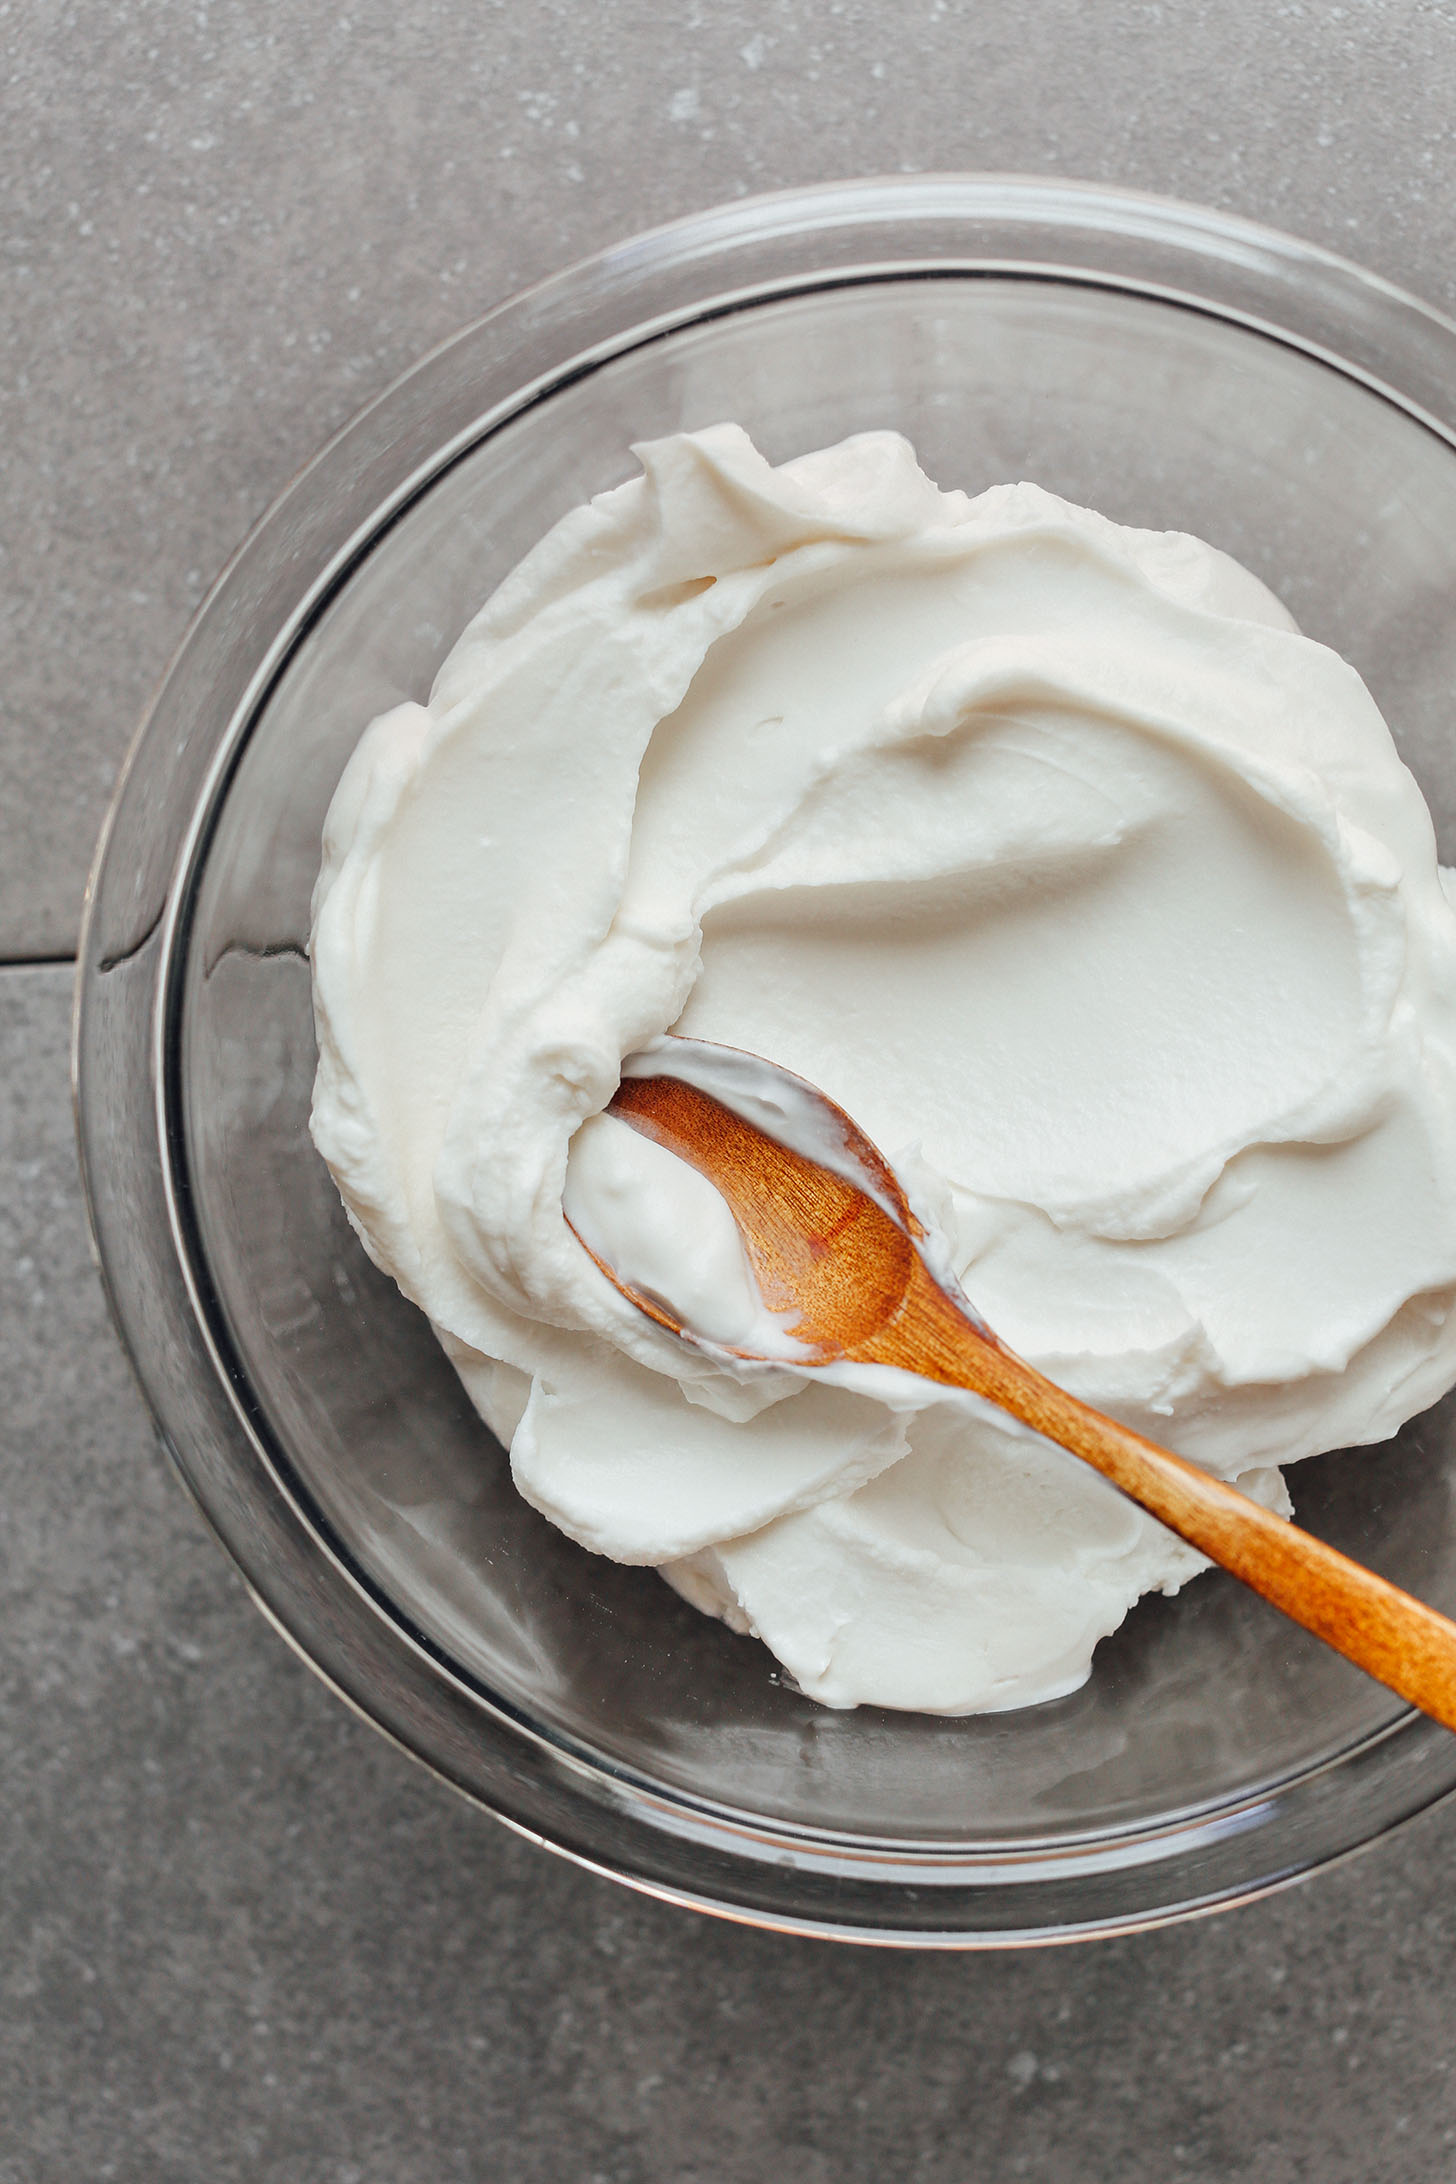
coconut cream. This game-changing ingredient, typically found in cans, is essentially the thick, high-fat portion of coconut milk that rises to the top when chilled. By starting with a product that is already rich in fat and low in water, we provided the perfect base for our probiotics to work their magic. The result was a spectacularly thick, Greek-style coconut yogurt that held its shape, exactly what we had envisioned.
Secrets to Thick Coconut Yogurt: Use Cream for Greek Style and elevate your homemade batches.
We also experimented with various thickening agents like raw honey and gelatin. While gelatin did produce a thick result, the texture was distinctly gelatinous – more wobbly than creamy, which wasn't appealing for yogurt. As for honey, we discovered it wasn't necessary for fermentation. While it can add a touch of sweetness, the probiotics will thrive without it, ensuring a sugar-free end product if desired. The key, unequivocally, is starting with high-quality, full-fat coconut cream.
Probiotics: The Unsung Hero of Fermentation
While coconut cream lays the foundation for texture, it's the probiotics that bring your homemade dairy-free coconut yogurt to life, transforming it from a simple ingredient into a tangy, gut-friendly superfood. However, not all probiotics are created equal, and the quality of your starter culture is paramount to success.
We learned this firsthand during one memorable batch where our "yogurt" tasted exactly like plain coconut cream, with no hint of that characteristic tangy fermentation. This told us immediately that the probiotics hadn't activated or fermented properly. The issue, we deduced, was with the quality and potency of the probiotic powder we had used.
The next time, we switched to a new probiotic product, and the difference was night and day. The cream fermented beautifully, developing that delightful tang and subtle effervescence that signifies a successful batch. This experience underscored a critical point:
always use high-quality probiotics with a robust CFU (Colony Forming Units) count. Look for reputable brands that clearly state their CFU count, ideally at least 60 billion CFUs per serving, and ensure the product is fresh and within its expiry date. The higher the potency, the more active cultures are available to kickstart and sustain the fermentation process, ensuring a consistent and delicious result.
Think of probiotics as tiny chefs in your coconut cream, diligently working to convert the natural sugars into lactic acid, which gives yogurt its signature tang and helps it thicken further. Without these active cultures, you simply have flavored coconut cream, not yogurt. Ensure your probiotic supplement is dairy-free and suitable for fermentation.
Your Journey to Perfectly Thick & Tangy Homemade Coconut Yogurt
Ready to embark on your own yogurt-making adventure? Here’s a summary of the critical steps and tips to ensure your homemade dairy-free coconut yogurt is a resounding success:
- Choose Premium Coconut Cream: This is non-negotiable for thick, Greek-style yogurt. Opt for full-fat, unsweetened coconut cream in a can (often found near coconut milk). Avoid "light" versions or coconut milk beverages, as these contain too much water. Chilling the can overnight can sometimes help separate any residual liquid, allowing you to scoop out only the thick cream.
- Select a Potent Probiotic: Invest in a high-quality, multi-strain probiotic supplement with at least 60 billion CFUs. Make sure it's dairy-free and check the expiry date.
- Sterilization is Key: Ensure all your equipment – jars, spoons, bowls – are thoroughly cleaned and sterilized. This prevents unwanted bacteria from interfering with your beneficial cultures.
- Gentle Mixing: Gently warm the coconut cream if it's too solid to mix easily (do not boil). Once smooth, stir in the probiotic powder until well combined. Do not use metal utensils with live cultures, as some believe it can harm them.
- Optimal Fermentation Environment: Transfer the mixture to a clean jar. For proper fermentation, maintain a consistent warm temperature, ideally between 100-110°F (38-43°C), for 12-24 hours. A yogurt maker, a proofing setting on your oven, or even a warm spot near a pilot light can work. Longer fermentation times generally result in a tangier yogurt.
- Patience for Perfection: After fermentation, the yogurt may still be slightly warm and less firm. Resist the urge to dive in immediately! Transfer it to the refrigerator and allow it to chill for at least 6-8 hours, or preferably overnight. This chilling period is crucial for the yogurt to set and achieve its optimal thick, creamy consistency.
Once chilled, your homemade dairy-free coconut yogurt is ready to enjoy! Indulge in its creamy goodness plain, or elevate it with your favorite toppings. Think fresh berries, granola, a drizzle of maple syrup, or a sprinkle of toasted nuts. It's also incredibly versatile in savory applications, working beautifully in dips, sauces, or as a cooling accompaniment to spicy dishes.
Making your own homemade dairy-free coconut yogurt is a simple yet incredibly rewarding endeavor. By understanding the pitfalls of store-bought options and embracing the power of just two quality ingredients, you can consistently create a thick, tangy, and gut-friendly yogurt that rivals any premium brand. Say goodbye to additives and hello to pure, homemade goodness. Your taste buds and your digestive system will thank you!